#1 JavaScript Project Series That Makes You Pro.
Hello Coders!
JavaScript is one of the leading names when it comes to front-end web development. Moreover, it is one of the best programming languages to learn and earn in 2021. There are several ways of learning JS, ranging from books to tutorials and one amazing way to learn javascript is building a projects.
So I'm start the series of javascript projects for learning javascript with enjoyable projects. Hope you like this mini project series.
Save This Series For Upcoming Projects.
🎨 Color Theme Switcher Using JavaScript.
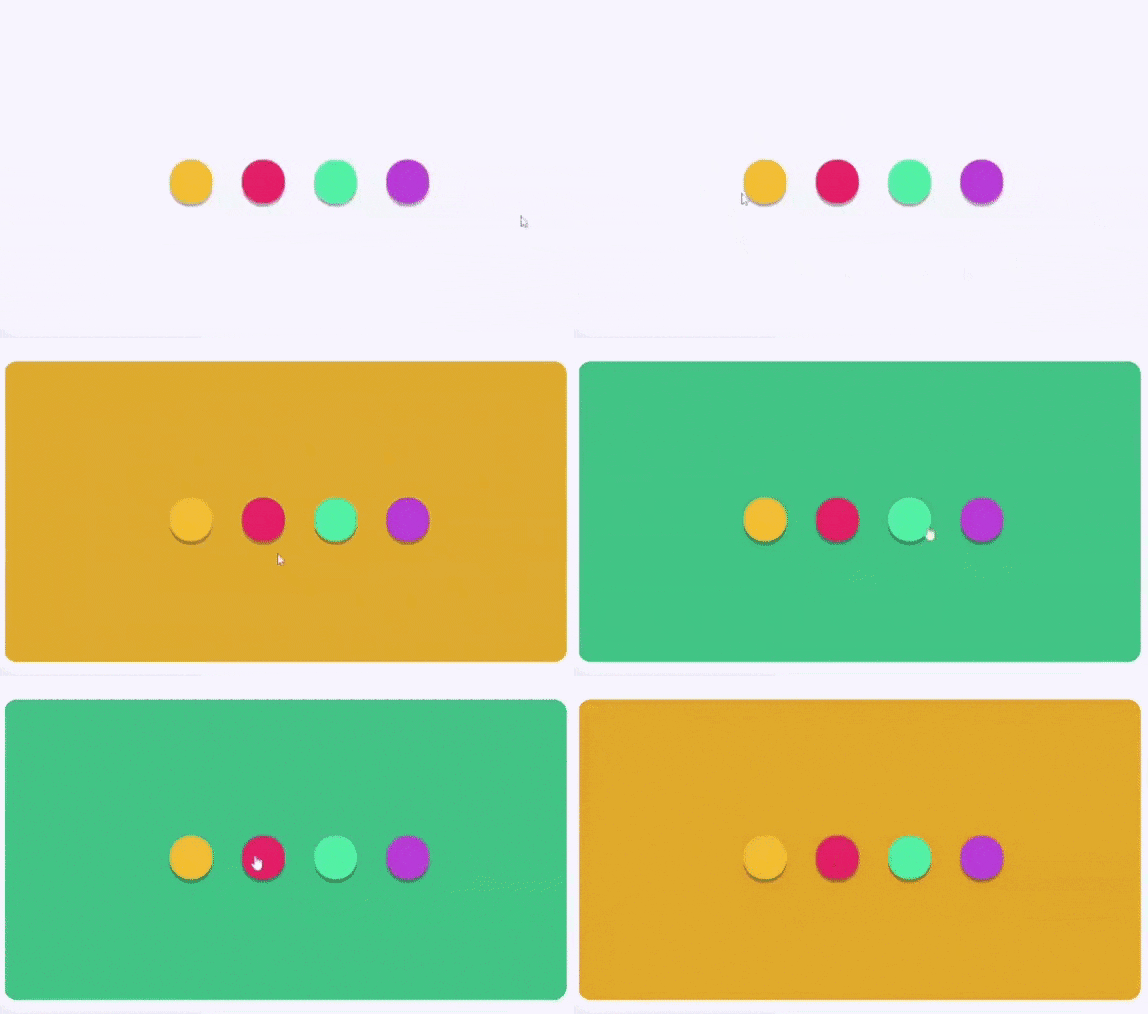
In this, we're going to see how you can change the theme of your website to any color you want using JavaScript. This can be considered as a mini-project if you're learning JavaScript. It teaches you DOM concepts and how to change styling of CSS through JavaScript.
Here's a preview:

- Step - 1: First Create project files - Index.html, Style.css and Script.js.
- Step - 2: Then Copy the below HTML code and paste it into your code editor.
Index.html
<!DOCTYPE html>
<html lang="en" >
<head>
  <meta charset="UTF-8">
  <title>CodePen - Color Change Buttons</title>
  <link rel="stylesheet" href="style.css">

</head>
<body>

<nav class="menu">
    <a href="#" class="menu__item menu__item--yellow " data-background="e4a924">
    </a>
    <a href="#" class="menu__item menu__item--red" data-background="c92142">
    </a>
    <a href="#" class="menu__item menu__item--green" data-background="37b983">
    </a>
    <a href="#" class="menu__item menu__item--purple" data-background="9f32b8">
    </a>
  </nav>

  <script  src="script.js"></script>

</body>
</html>
Here we have used tag to choose various colors for the theme. We have used an attribute "data-background" to specify the default background of the anchor tags.
Step - 3: After creating html file next is the use CSS code for styling.
Style.css
html {
  height: 100%;
  font-size: 1.3vw;
}
body {
  height: 100%;
  display: flex;
  align-items: center;
  justify-content: center;
  background-color: #f6f7fc;
  transition: background-color 0.55s;
  will-change: background-color;
  margin: 0;
}
.menu__item {
  width: 3.5rem;
  height: 3.5rem;
  border-radius: 12.5rem;
  display: inline-block;
  margin-left: 2.1rem;
  animation-name: close;
  animation-duration: 0s;
  will-change: width background-color;
  transition: background 0.55s;
  vertical-align: top;
  display: inline-flex;
  align-items: center;
  justify-content: center;
  box-shadow: 0px 5px rgba(0,0,0, 0.3);
}

.menu__item:first-child {
  margin-left: 0;
  background: #fabe2b;
}
.menu__item:nth-child(2){
  background: #f43768;
}
.menu__item:nth-child(3){
  background: #45e1a3;
}
.menu__item:nth-child(4){
  background: #c152da;
}
.menu__item--animate {
  animation-duration: 0.5s;
}
.menu__item--active {
  width: 17rem;
  animation-name: open;
}

.menu__item--active.menu__item--yellow { background: #fabe2b; }
.menu__item--active.menu__item--red { background: #f43768; }
.menu__item--active.menu__item--green { background: #45e1a3; }
.menu__item--active.menu__item--purple { background: #c152da; }
- Step - 4: Below is the JavaScript code which is the most important part in this Theme changer.
- We declared a const
menuItemswhich will get the tag attributes of our tags. - Then in that const we store all the mouse event listener and at the same time calling the
buttonClick()method which assigns the specified color to the background.
Script.js
const menuItems = document.querySelectorAll('.menu__item');

for (var i = 0; i < menuItems.length; i++) {
  menuItems[i].addEventListener('click', buttonClick);
}

function buttonClick() {
  if (!this.classList.contains('menu__item--active')) {
    document.body.style.backgroundColor = `#${this.getAttribute('data-background')}`;
  }
}
And that's it. You're done.